This blog is now discontinued as I have moved all my blogs to one central blog
Google Docs Tricks and Tips
Friday, January 13, 2017
Thursday, March 10, 2016
New Updated Forms
The New Forms layout is so much easier to use then the old. Here is tutorial for the new forms.
Monday, November 2, 2015
Homework in Google Slides
I am not a huge fan of homework unless it is purposeful and authentic to student learning. But if your school policy is to have homework and there is a parent expectation then you can set up an easy homework regime in Google Slideshow.
The example below which you can download by clicking on the Options button - Open Editor (Make a copy) and adapt for yourself, has these components
The example below which you can download by clicking on the Options button - Open Editor (Make a copy) and adapt for yourself, has these components
- Click on the Spelling City link, add your words for the week and test yourself, type in your score
- Double click on the youtube movie to practise your timetables for the week
- Add your spelling list words
- Add your basic facts to learn for the week
- Add to your reading log the books you have read this week
Sunday, November 2, 2014
Writing Te Reo with macrons in Google Docs
I had a teacher ask me today how she could write in Te Reo on Google Docs.
All you need to do is add the Māori Keyboard.
All you need to do is add the Māori Keyboard.
Tuesday, August 26, 2014
Marking student work in Google Docs
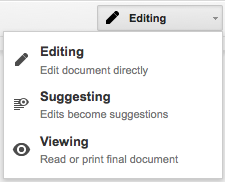
 Cissy from Flatbush School asked me an interesting question today that took a little thinking on my part. She has been using the 'Suggesting' part of Google Docs while her students are writing their stories.
 The only problem is that once the students edit their work and click the tick, you cannot see what 'marking' the teacher has done.
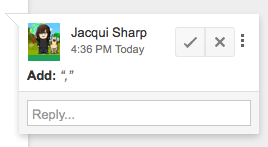
Marking by the teacher before the student edits it looks like below
When the students click the tick and resolve comments (which of course they want to do so that they can publish their edited work) it looks like this...
All of the comments and suggestions by the teacher disappear.
Cissy's problem is that she wants to be able to access the student's work showing her marking (evidence of what she has been doing with the student), as well as the student edited doc. But the students are fixing their mistakes as quickly as she is marking them.
I suggested using 'See Revision History' under the File menu. She could open that, click on the revision where she had made the changes and view the changes. If she needs to print it out, she will need to click on 'Restore this revision' then print. To see all the marking printed out, you can go to File - Download as Microsoft Word. This will show all the marking as red markups on the Word Document. To get the finished edited version back, you need to click on 'See Revision History' and then click back on the version before.
This is useful to know as teachers are accountable for student learning and this is one way of proving teacher input.
Tuesday, July 1, 2014
Pull Data from Spreadsheets
Marama from Clevedon School came up with a great idea of creating a spreadsheet where each sheet has individual student's assessment data. She then wanted to share each student's sheet to them. With normal sharing options you can not share just one sheet, sharing allows you to share the whole spreadsheet. This poses a problem, as she doesn't want the other students or parents to see each others results. There is a hide option in Google Spreadsheets where you can hide the sheets you don't want others to see, but anybody could un-hide them if they are spreadsheet savvy. After a little research we found an old solution that didn't work but it gave us a basis to work from
You may need change permissions on your original class doc to 'Anyone with this link'.
You may need change permissions on your original class doc to 'Anyone with this link'.
Wednesday, June 4, 2014
Copying Pasting in Google Docs, Presentation and Draw
One recently added feature I found by mistake, is that you can copy and paste in Google Docs, Draw and Presentations. This is really useful and a great time saver. If you see an image online, you can right click, select 'Copy Image', go back to the Doc, Draw or Presentation and Ctrl V or right click and select Paste. If
you are making instructions and have taken a screen capture somewhere
on your computer (Windows use Snipping Tool, click and drag around what
you want to use and choose Copy) Go back to Doc and Paste.
(Macs use Shift -Control -Command-4, click and drag around what you want to use) Now go to your Google Doc or Presentation and Ctrl V or right click and select Paste.
Note: If you are copying from Doc to Doc/Presentation or Draw, you cannot right click, you need to use Ctrl C (Win) Command C (Mac) to copy and Ctrl V (Win) Command V (Mac) to paste.
This process saves you the time of saving images to your computer and then having to go to Insert-Image, choose image, wait for it to load, select image and wait for it to appear on the page.
Subscribe to:
Comments (Atom)


